This blog was written and submitted to us by Torben Wendland
In this article, we move on to the next stage, main exposure, in flexo platemaking.
Main Exposure
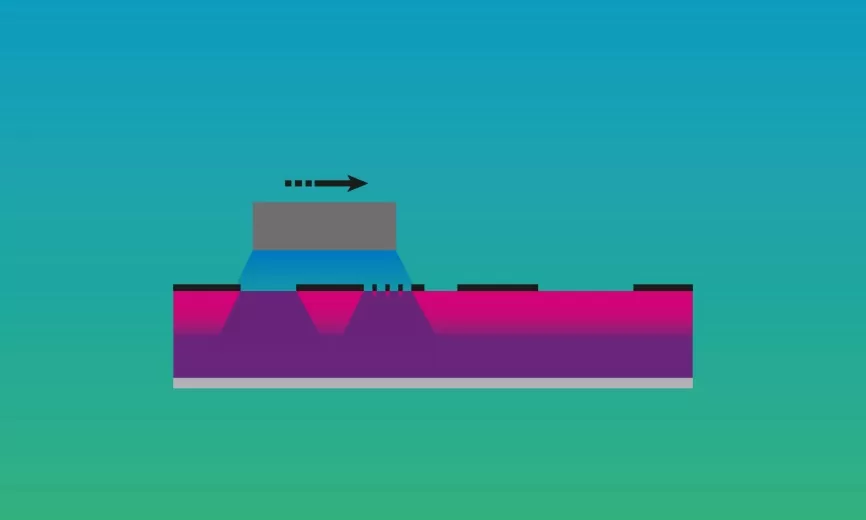
The main exposure of flexo printing plate starts the chemical reaction that creates the plate relief. UV-A light is penetrating the plate through the mask openings which were created during the imaging process. This causes cross-linking of the plate components in the affected areas. Because of light reflections the emerging relief elements do not have a straight, but an angled wall, also called the “shoulder” of the relief element.
 𝔰𝔯𝔠 Torben Wendland
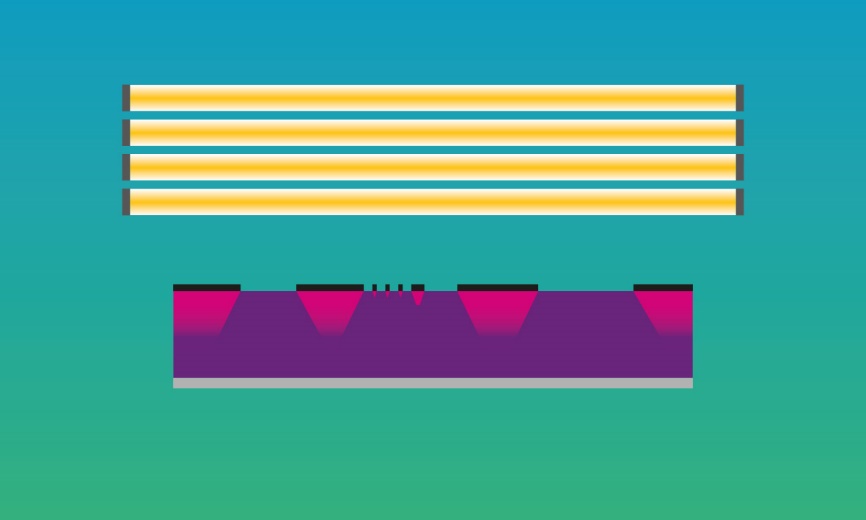
UV-A tube vs. LED exposure
The UV-A light source – usually working at a wavelength of 365 nm – can either consist of tubes or an arrangement of LEDs. Tubes have a lower intensity but are covering the whole surface of a full-sized plate so that it can be evenly exposed at the same time. LEDs have a higher intensity but are usually arranged in a line of several arrays, only covering one side of the plate dimension. In case of tubes, a flood exposure of the complete plate is done over a certain time. Exposure with LEDs is similar to a scanning process, in which the light bar is traveling over the plate either once or several times.
 𝔰𝔯𝔠 Torben Wendland
Which main exposure parameters are used?
While for conventional plates, a main exposure test was necessary to define the best exposure length, for digital plates usually the parameters are provided by the supplier of raw plates or the exposure device. For tube exposure, typically a length between 5 and 15 minutes is required. For LED exposure, either a pre-defined set of exposure passes is provided or the plate maker him-/herself is free to set up an own setting. In either way, the chosen exposure parameters represent the best compromise between the following targets:
- Stabilising of fine details (like highlight dots) on plate
- Keeping reverses open (like negative lines or text)
- Limiting the length of the exposure
Which are the steps during main exposure?
The imaged plate is placed on the exposure table. Depending on the type of device, the back exposure was done already before imaging or is done now. At the push of a button, the tube or LED exposure process is started. In case of a glass bed exposure, the back exposure is done automatically before the main exposure. After the main exposure is finished, the plate making continues with the plate processing.


